Below is a list of items that I used daily for card-making, items I’ve tested and believe in. Affiliate links are used when available (more on affiliate links at the bottom of the page).
Die Cutting

Spellbinders – Platinum 6 – Die Cutting and Embossing Machine
I have been using this machine since day one, and never had any issues with it. It’s always cut beautifully for me. Replacement plates are reasonably priced too.

Crafter’s Companion – Gemini – Die-Cutting and Embossing Machine
I bought a full size version of this electric die cutting machine at the beginning of 2018 (I got it for the price of the JR size). I love this machine! I prefer the full size, because you can use the smaller plates (you have to feed them in on the long side) and still have the larger plate for big projects. It does make some noise, so I can’t use it in the morning (teenagers!), but otherwise it’s great. Let’s not forget the magnetic shim either. It’s great for keeping your dies from shifting.

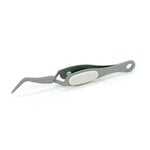
Die Release Tool If you are going to do any die cutting, you definetly need a pointy tool to help poke out the die cuts. This tool is great because it has a spatula end to help gently pry up your cardstock.
EK Success – EK Tools – Craft Tweezers
I’m adding these under die cutting, but they are really an all purpose tool. These are reverse tweezers, so they are closed on their neutral position. You have to squeeze them to open them. They are great for holding a small piece of cardstock while heat embossing, placing pieces after you have added glue, or holding something in place until you can secure it.

Small Dishes You can pick these up anywhere, the dollar store, Michaels. Anywhere. I keep a couple in my tool cart, right by my desk. They are great for holding small die cuts, stamps, dies, anything small you don’t want to lose.
Stamping

Original MISTI I think almost everyone is familiar with the MISTI. There is a mini MISTI and a Memory MISTI as well. I have the original size and love it. I actually started out using a different stamp tool, which was discontinued. When it broke, I switched to the MISTI. I almost always stamp using the MISTI. I seldom use acrylic blocks, because I’m ensured a good impression with the MISTI.

My Sweet Petunia – Creative Corners
I can’t mention the MISTI without mentioning the creative corners. These acrylic pieces are a life saver when trying to line up stamps on your cards.
Tonic Studios – Tim Holtz – Stamp Platform
I also have the Tim Holt Stamp Platform. This is a more reasonably priced stamping tool. I like to use this tool when I am stamping a large image, like a Turnabout stamp. Or, when I’m doing a wet technique, like watercolor stamping. This tool cleans up nicely.

Original Turnabout Jig
Since we are talking about Turnabout stamps, we have to mention the Turnabout Jig. This tool makes stamping turnabouts so easy!
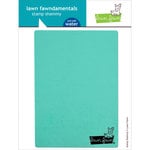
Lawn Fawn – Stamp Shammy You can’t talk about stamping without discussing stamp cleaning. I admit I’ve struggled with this topic myself. I’ve had a stamp shammy from almost day one, but I haven’t really gotten into using it until recently. I was a tried and true baby wipe person until about a month ago. I made the switch to the shammy, and now I am kicking myself. The baby wipes were always leaving little pieces of lint on my stamps, no mater how careful I was. Not with the shammy!

Hero Arts Ultra Clean
Another cleaning product I have had since the beginning. I use this with the Scrubber pad (below) to clean the really tough to clean stamps. Those stamps that I can not get clean with the shammy or baby wipes. I also use Ultra Clean to clean my MISTI when it gets dirty.

Hero Arts Scrubber Pad This is exactly what it says it is, a scrubber pad. It’s got soft, not quite bristles, but brush like thingy’s that get in the nooks and crannies of stamps. Its a life safer for dirty stamps.
Heat Embossing
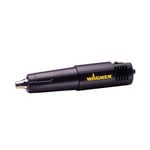
Hero Arts – Wagner – HT400 Precision Heat Tool
Another tool I swear by! I did purchase one of the cheap heat guns from a well known craft store when I first started making cards. I think it might have lasted 6 months… maybe. This bad boy has been with me ever since (almost 2 years). Not only is it sturdy and better made, but it melts embossing powder more evenly.

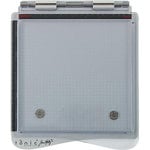
Ranger Ink – Anti-Static Pouch
Another tool you can’t do without. The pouch is full of powder, and you use it to treat your cardstock before heat embossing. Embossing powder loves to have an excuse to stick to everything (fingerprints, sticky spots, random things). By using the powder first, you cut down on the spots, other then where you’ve stamped. It’s so obvious when I forget to use the pouch. The funny thing is it’s such a cheap tool, to have such a big impact. And it last forever. My first pouch has lasted 2 1/2 years and I am just now replacing it. I did try the EK Success Powder tool. It was ok, I just didn’t like the way is smelled (like baby powder).
Cutting
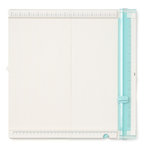
We R Memory Keepers – Trim and Score Board
This was the very first cutting tool that I purchased. I got it on sale from Michaels (the original version, they released a new one in 2018). I like it, especially because it’s a combination cutting tool and score tool. But, I have always struggled to get straight cuts with it. The replacement blades are reasonably priced. The link here is for the new Replacement blades .

Tonic Studios – Tim Holtz – 8.5 Inch Comfort Trimmer
I grabbed this new cutting tool after seeing Jennifer McGuire use it repeatedly. I love it! This one cuts straight every time.

Tonic Studios – Tim Holtz – Non-Stick Micro Serrated Scissors – 9.5 Inch Titanium Shears
I have these scissors in both the 9.5 in and 7 in sizes. I like them because they are non-stick. They cut awesomely. The longer ones are good for trimming pieces off of cards.
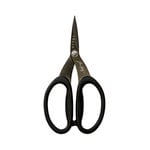
Tonic Studios – Tim Holtz – Non-Stick Micro Serrated Scissors – 7 Inches
Misc.
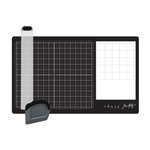
Tonic Studios – Tim Holtz – Glass Media Mat and Tool Set Bundle
I don’t know how I got along without this mat. I use it as my main crafting mat, it’s always on my desk. I love it because if I need to ink blend, I don’t have to get out another mat. It’s so convenient.

Ranger Ink – Tim Holtz – Distress Blending Brushes
I know there are so many blending tools available now, but I still reach for these when I used Distress Oxide ink. I get light coverage if I need it, and I have one for every color.

Ranger Ink – Tim Holtz – Mini Ink Blending Tool – Round
I still have my old school ink blenders too. They put down intense ink. spare blending pads
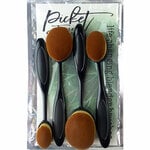
Picket Fence Studios – Tools – 4-Pack Broad Blender Assortment
I had to mention these new blender brushes, these and the Taylored Expressions Blender Brushes. These are definitely worth all the hype! They give you such control over your ink application. It is so easy to blend well with them.

We R Memory Keepers – QuickStik Scrapbook Tool
Another tool I use on almost every card. This tool has a sticky end to let you pick up gems and sequins, along with other tiny pieces. The opposite end has a pick/spatula end that comes out of the tool, and is also good for positioning tiny things.
Adhesives
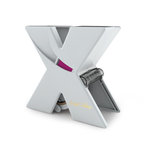
Xyron – Teresa Collins – Sticker Maker – Permanent This was one of the first “tools,” I purchased. My sister had had one back in our scrapbooking days. It’s handy for adding adhesive to smaller die cuts. It’s also good for vellum, as it completely covers the piece. You can get refill cartridges in either permanent or reposition-able tack.

Scor Tape I’m a big fan of Scor-Tape (it’s also sold under Be Creative tape and other brands). This tape is very tacky, and holds everything. I buy it in 1/8″ and 1/4″. It’s also easy to tear, and easy to remove the release paper.

Kokuyo Dot Runner I like the Longer one, but use both. This is another great adhesive. I use this one when I am adhering cardstock to cardstock. I like it because it gives you a little bit of wiggle room, until you press it down really good. It also is easy to rub off, if you need to. There are refills for both sizes.

Temporary Adhesive
As the name implies, this is a temporary adhesive. It’s great for holding cardstock on the turnabout jig or temporarily holding things in place. There are refills available.

Ranger Ink – Glossy Accents – Clear Dimensional Embellishment – 2 ounces
This stuff is the best! I add it to images to add shimmer, like to glasses or eyes. I haven’t used it for an adhesive.
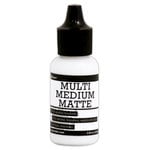
Ranger Ink – Multi Medium – Matte – .5 Ounce
I’m not a big liquid adhesive fan, for a long time I only used it for adding embellishments. I add a Precision Tip to the bottle, to give it more control (below).
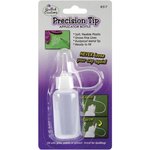
Quilled Creations – Applicator Bottle – Precision Tip

Gina K Connect Glue This is the stuff that turned me into a liquid adhesive fan. I don’t use it all the time, but I do use it more than I did Multi Medium Matte. I like to use liquid adhesive when I need to move things around. This glue gives you the chance to move things and make adjustments.
Affiliate Links
I’ve recently started using affiliate links. I don’t know about you, but I wasn’t a big fan about affiliate links when I first started out card making. I’m not really sure why, probably out of ignorance. Now, after having my blog for over 2 years, I understand their use. When you click on a link and purchase something from that site, I get a commission from that site. It doesn’t cost you anything, and it helps me maintain this page. You are under no obligation to use the links or to purchase anything. However, if you do need supplies, please consider using the affiliate links. If I don’t have a link to a specific item you need, you can still use the link to get to an online store, and then search their page. If you have any questions, please let me know! I want to be as transparent as possible with you.
